
Maybe It’s Time For Microgarden
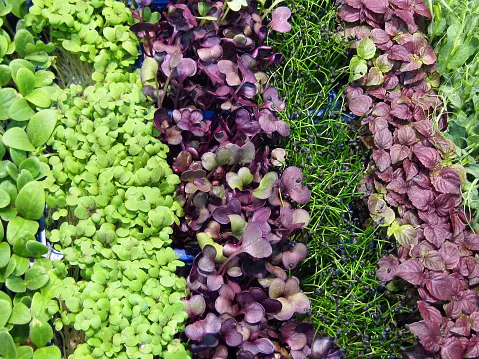
Microgreens have gained significant popularity in recent years due to their nutritional value, delicious flavors, and ease of cultivation. These tiny greens, packed with vitamins and minerals, are harvested at an early stage of growth, typically within 1-3 weeks. Growing microgreens in a micro garden is an excellent way to enjoy fresh, homegrown greens all year round, regardless of limited space.
Why Microgardens?
A microgarden is a small-scale gardening system designed for compact spaces, such as balconies, patios, or even indoor areas like windowsills or kitchen countertops. It allows individuals with limited space to engage in gardening and enjoy the benefits of growing their own plants. Microgardens have gained significant popularity for several reasons.
Firstly, microgardens offer a solution for urban dwellers who may lack access to traditional gardens or outdoor spaces. In densely populated areas, finding suitable land for gardening can be challenging. However, with a microgarden, anyone can create a green oasis in their living space, regardless of size or location.
Secondly, microgardens provide an opportunity for sustainable living and self-sufficiency. Growing your own herbs, vegetables, or even microgreens in a microgarden allows you to have a fresh supply of produce at your fingertips. It reduces the reliance on store-bought produce, which often travels long distances and may be exposed to pesticides or other chemicals. Microgardens empower individuals to take control of their food sources, promoting healthier eating habits and reducing the carbon footprint associated with conventional agriculture.
Furthermore, microgardens can be aesthetically pleasing and contribute to the overall ambiance of a space. Whether it’s a collection of colorful flower pots adorning a balcony or a vertical garden cascading down a wall, microgardens add beauty and a touch of nature to urban environments. They create a sense of tranquility and connection with the natural world, even in the midst of a bustling city.
Additionally, microgardening offers a therapeutic and stress-relieving activity. Tending to plants, nurturing their growth, and witnessing the fruits of your labor can be immensely satisfying and calming. Gardening has been proven to have numerous mental and emotional health benefits, including reducing stress, improving mood, and promoting mindfulness.
Can I Grow Microgreens in a Microgarden?
Microgreens can indeed be grown in a microgarden, making them an ideal option for urban dwellers, apartment owners, entrepreneurs with a home office, or anyone with limited outdoor space. A microgarden refers to a small-scale gardening system designed for compact areas. It can be as simple as a windowsill or a dedicated indoor space with controlled environmental conditions.
7 Steps to Growing Nutrient-Rich Greens in a Microgarden
Step 1: Selecting the Right Microgreens
To get started, choose the microgreens you want to grow in your microgarden. Popular options include kale, arugula, spinach, broccoli, radish, and sunflower greens. Select a variety that suits your taste preferences and nutritional needs.
Step 2: Gather the Necessary Supplies
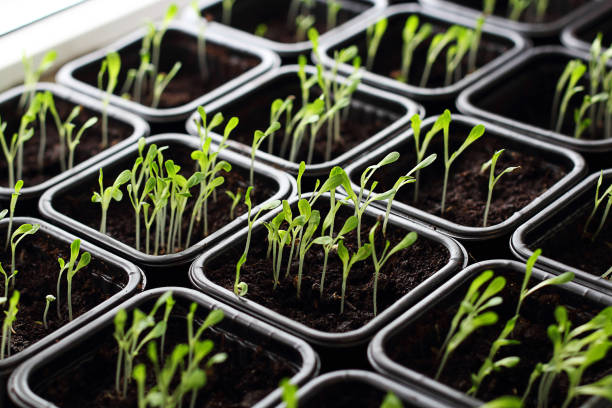
Before you begin sowing your microgreens, gather the essential supplies. These typically include trays or containers, high-quality potting soil, seeds, water, and a spray bottle for misting.
Step 3: Preparing the Growing Medium
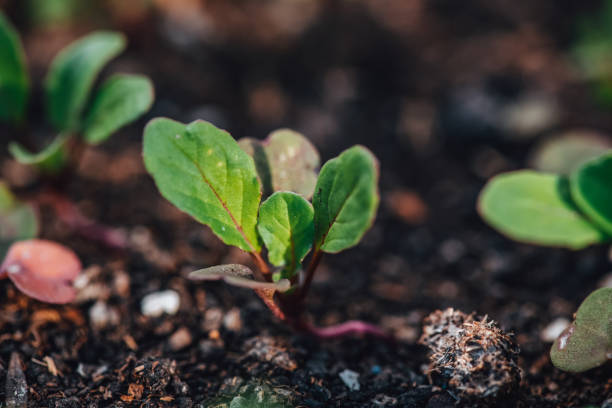
Fill the trays or containers with potting soil, ensuring it is loose and well-draining. Avoid using garden soil, as it may contain pests or diseases that can harm your microgreens. Moisten the soil lightly with water to create a moist but not waterlogged environment.
Step 4: Sowing the Seeds
Evenly spread the seeds over the prepared soil surface. The density of the seeds will depend on the variety, but as a general rule, avoid overcrowding to allow each seedling enough space to grow. Gently press the seeds into the soil to ensure good contact.
Step 5: Providing Optimal Growing Conditions
Microgreens thrive in a warm and well-lit environment. Place the trays in an area that receives plenty of natural light or use grow lights if natural light is limited. Maintain a consistent temperature between 60-75°F (15-24°C) for optimal growth.
Step 6: Watering and Misting
Water the microgreens gently, using a spray bottle or a watering can with a fine nozzle. Avoid overwatering, as excess moisture can lead to mold or rot. Mist the greens daily to maintain proper humidity levels and promote healthy growth.
Step 7: Harvesting and Enjoying Your Microgreens
After about 1-3 weeks, your microgreens will be ready for harvest. Use a clean pair of scissors or a sharp knife to cut the greens just above the soil line. Rinse the harvested microgreens gently, pat them dry, and savor their vibrant flavors and nutrient-packed goodness in salads, sandwiches, or as garnish.
A Few More Must-Knows
Before starting your microgarden, take a look at some of these final tips.
Lighting requirements: Most plants require ample sunlight to grow and thrive. Before setting up your microgarden, assess the lighting conditions in your chosen space. Select an area that receives at least 4-6 hours of direct sunlight each day. If natural light is limited, consider investing in artificial grow lights specifically designed for indoor gardening.
Choosing the right containers: Select appropriate containers or pots for the size of the plants you wish to grow. Ensure they have proper drainage holes to prevent waterlogging and root rot. Consider using sustainable or biodegradable containers made from materials like terracotta or fabric pots.
Watering and irrigation: Proper watering is crucial for the health and growth of your plants. Avoid overwatering, as this can lead to root rot and other issues. Conversely, ensure that your plants receive adequate moisture. Monitor the moisture levels in the soil and water whenever it feels dry to the touch. Using a moisture meter can be helpful in determining when to water.
Choosing the right soil: Selecting the right soil or growing medium is vital for the success of your microgarden. Opt for a well-draining potting mix specifically formulated for container gardening. Avoid using garden soil, as it may be too heavy and compacted for container plants. Adding organic matter, such as compost or coconut coir, can improve soil structure and nutrient content.
Fertilization: Microgreens and other plants in a microgarden may benefit from regular fertilization. Choose a balanced, water-soluble fertilizer specifically formulated for edible plants. Follow the manufacturer’s instructions for application rates and frequency. Organic fertilizers, such as fish emulsion or seaweed extracts, are also popular options for those who prefer natural alternatives.
Pest and disease management: Even in a microgarden, pests, and diseases can be a concern. Monitor your plants regularly for any signs of pests, such as aphids or fungal diseases. Consider using organic pest control methods, such as insecticidal soaps or neem oil, to address infestations. Proper sanitation and good airflow can also help prevent disease outbreaks.
Succession planting: To ensure a continuous supply of fresh produce, practice succession planting. This involves staggering your planting schedule so that you have new crops ready for harvest as others are finishing. This way, you can enjoy a consistent supply of microgreens or vegetables throughout the growing season.
Ready To Grow
Growing microgreens in a microgarden is an accessible and rewarding way to produce nutrient-rich greens at home. By following the seven steps outlined in this article, you can embark on a journey of cultivating your own microgreens, regardless of space limitations. Experiment with different varieties, explore new flavors, and relish the joy of harvesting and savoring these miniature powerhouses of nutrition.


